
Looking for easy and amazing party favor ideas? Here's a step by step tutorial on how to make a paper crown!
Jump to:
What makes this Paper Crown a great Party Favor Idea?
My love for party planning is absolutely my passion. I've definitely come to realize that over the past couple of weeks. I'm happiest when I'm putting together something that starts with the tiniest detail and finishes in exuberant style. I love the reaction of others. Especially, of my four year old.
Although, I definitely go all out, I also always find projects that are quick and easy. These party favors for kids that I put together for Riley's Princess Birthday Party are no exception. They consist of three supplies that come together to make the perfect DIY Kings Crown in about five minutes.
Now, before I jump right into the tutorial, which I absolutely promise to do, I want to share some exciting news. Take a look at the photo below. Not at Avery. At the magazine {I'll let you scan}. Recognize someone? Squeal! That's Riley! I've been holding out on all of you because I didn't believe it was really going to happen until I saw the published document.

I created and photographed a Luck of the Irish party, which was featured in a three page spread in the kids magazine Yum Food and Fun For Kids. So, I've had St. Patrick's Day on my mind since September so you better bet your butt that you'll see some amazing projects here for St. Patrick's Day.
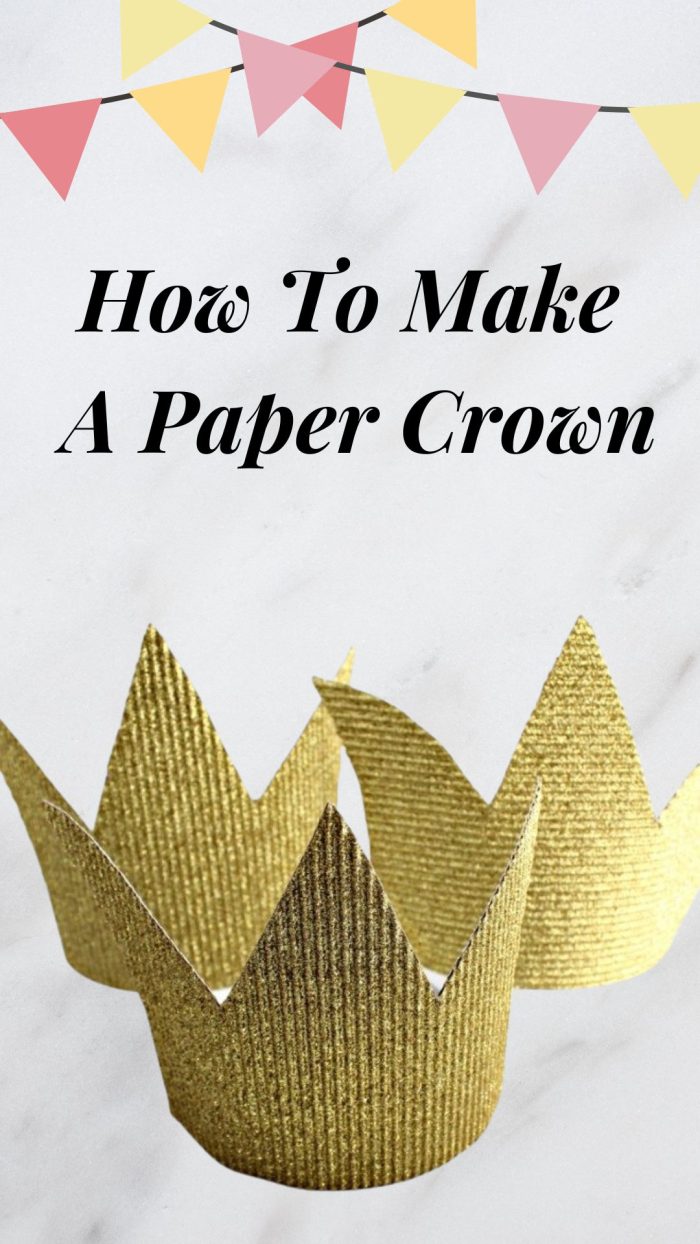
Alright, so back to How To Make a Paper Crown. The thing that I love about these crowns is that they are so versatile and they hold up so well. I made these for the boys at Riley's Princess Birthday Party. Since I have nephews, I always try to be sensitive about not going to girly with my projects, which you all saw with my Princess Party Favors.
Supplies needed:
The supplies you will need for these easy paper crowns are plastic headbands, thick cardboard like paper {mine was covered in gold glitter and I found it in the scrapbook section at Michaels}, and hot glue. That's it!

How to make a Paper Crown:
I hand drew my crown, but you could definitely use a stencil if there was a specific type of crown that you were looking for. I made my crown so that it would cover the front third of the headband. The headband is meant to sit on the child's forehead, not behind their ears.

Once the crown is cut out simply hot glue it to the headband. The way that the crowns are sitting in the picture is exactly the way that it will sit on the child's head.
Tips and Tricks:
If you can't find the gold glittered cardboard, you could easily use a piece of cardboard, cover it in glue and then glitter and let it sit overnight so that the glitter sticks onto the cardboard.
Here's one quick tip though. Whenever you use glitter, if you put a paper plate underneath your material it will catch the glitter and make clean up a cinch.

If you are looking for more amazing Kids crafts check out this tutorial for making a Paper Mache Mask!
Ramona Mills
I am not sure where you are getting your information, but great topic. I needs to spend some time learning more or understanding more. Thanks for excellent info I was looking for this information for my mission.
Neha
We are happy you found our content useful. Thankyou for the compliment!
Tiff
That looks like a bunch of fun!
Laurie
These are fabulous. Thanks for linking up to Tip Me Tuesday linky party this week. {knuckle bumps}
Did you know that I can “lend” your blog posts my Google page rank for better search engine traffic?
{fabulous}
If you upload at least 2 images, 2 steps, and blog post URL into your Tip Junkie craft room, you’ll be in business!
{wink} ~ Laurie {a.k.a. the Tip Junkie}
http://www.tipjunkie.com/post/how-to-add-a-craft-room-project-on-tip-junkie/
Heather {Woods of Bell Trees}
I love, love, love these. My little man would feel so special to have these made for him! Such a cute idea!
Amy W
I adore these simple gold crowns. I have no doubt my kiddos would wear them every single day! So fun. Please share at our link party!!
http://www.delineateyourdwelling.com/2014/02/link-it-or-lump-it-party-no-25.html
Jen
These are darling Jenny! Love this!