
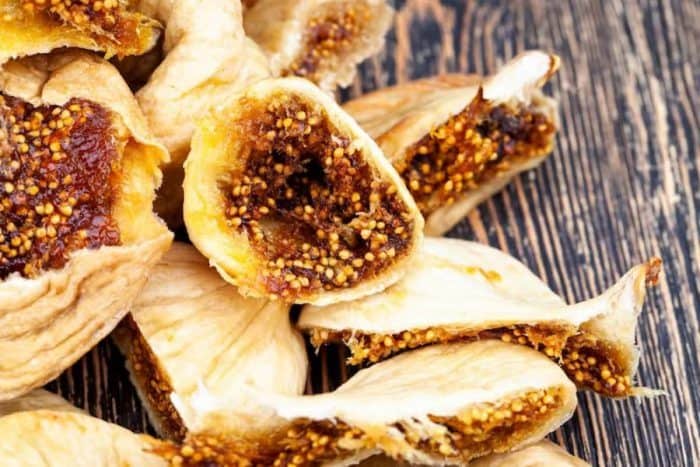
Ever wondered about the secret to enjoying figs all year round? The answer is simpler than you might think — drying them!
Doing so not only extends their shelf life but also intensifies their sweetness and gives them a delightful chewy texture.
But how exactly do you dry figs, you ask?

Well, we’re here to show you! In this article, we're going to walk you through how to dry figs using five different methods and provide step-by-step guidelines for each.
5 Tried-and-Tested Methods To Dry Figs
Excited to learn how to dry figs to preserve their sweet flavor and enjoy them long after the season for fresh figs has passed?
There are five main methods you can use to dry figs, and the best one for you depends on what equipment you have available and how much time you're willing to invest.
Let's explore some of these methods.
Oven-Drying Method
The oven-drying method is a widely employed technique for drying and preserving figs.
Using a conventional oven at a low heat setting, this process allows for a controlled and consistent drying environment.
While it may consume more energy compared to other methods, it's a practical option if you don't have specialized drying equipment.

Here’s how to dry figs using the oven-drying method:
- Preheat your oven to the lowest setting, usually around 140°F to 200°F. Lower temperatures help to preserve the fruit's natural sugars and flavors.
- Arrange your halved figs side up on a baking sheet lined with parchment paper.
- Place the baking sheet in the preheated oven. The drying process can take anywhere from six to eight hours.
- Check the figs and turn them periodically, letting them dry evenly.
You'll know they're done when they become leathery but still pliable. They also shouldn’t release any juice even when they’re squeezed.
- Once done, remove the figs from the oven and let them cool before storing. They can be stored in an airtight container for several months in a cool, dark place for later use.
Top tip: It's crucial to monitor the figs regularly to prevent overdrying and achieve the desired texture and taste.
Dehydrator Method
The dehydrator-drying method is another common technique used to preserve figs.
This method employs a special appliance called a dehydrator, which circulates a consistent flow of warm air around the figs to remove their water content.
Using a dehydrator can be a more energy-efficient method than an oven.
This is because it is designed for low-temperature drying, especially for larger batches, and it allows for more precise control over the drying temperature.

Here’s how to dry figs using a dehydrator:
- Arrange the halved figs with the cut sides up on the dehydrator trays.
- Set the dehydrator temperature to around 135°F to 140°F. The exact temperature may vary based on the specific model of your dehydrator, so refer to the user manual for the best results.
- Place the trays in the dehydrator and let it run. The drying process may take between six to 12 hours.
- Once dried, allow the figs to cool before storing them in an airtight container. They can be stored for several months to a year.
Sun-Drying Method
The sun-drying method is one of the oldest and most natural techniques used to preserve figs. This method harnesses the power of the sun for effective drying.
It's a great method for those who live in regions with hot, dry climates and plenty of sunshine.
But sun-drying requires constant vigilance; you may need to place the figs indoors every night to ensure they are not exposed to dew or sudden rain.
So it's a labor-intensive method, but the resulting dried figs have a wonderful, concentrated flavor that's worth the effort.

Here are easy-to-follow steps for drying figs using the sun-drying method:
- On drying racks or screens, arrange the halved figs with the cut sides up.
- Place the racks in a sunny, dry, and airy location. The ideal temperature for sun drying is above 85°F with relative humidity below 60%.
- Cover the figs with a net or cheesecloth to protect them from insects and dust.
- Depending on the intensity of the sun and the size of the figs, the drying process can take anywhere from two to seven days.
Make sure to rotate the figs or change their position frequently to ensure even drying.
- Once the figs have dried to a leathery texture, bring them indoors during the cool night to prevent outdoor moisture from rehydrating them.
- After drying, allow the figs to cool before storing them in an airtight container. They can be stored for several months to a year.
Top tip: If you opt for this method, choose figs that are slightly firmer to withstand the longer drying process.
Air-Drying Method
Air-drying is another method used to preserve figs. It relies on the natural circulation of air, often aided by fans, to remove moisture from the figs.
Compared to sun-drying, air-drying is a slower process, and it may not result in the same concentrated sweetness in the figs.
However, it's a more viable method in regions with less sunshine or during cloudier seasons. It also requires less attention as there's no need to bring the figs indoors each night.
Here’s how to dry figs using the air-drying method:
- Position the halved figs with the cut side facing up on drying racks or screens, ensuring ample space between each fig for optimal airflow.
- Place the racks in a well-ventilated, dry area. If possible, a fan can be used to increase air circulation and speed up the drying process.
- Cover the figs with a protective net or cheesecloth to keep insects and dust away.
- Leave the figs to dry. Take note that the air-drying process can take anywhere from several days up to a week, which will vary based on the humidity and air circulation in your area.
- Once the figs are completely dry, store the dried figs in airtight containers or a cool, dark place to protect them from moisture and pests.
Microwave-Drying Method
Microwave drying is a quick method for drying figs.
In comparison to the oven-drying method, it's a much quicker process, often taking only a fraction of the time.
However, it's important to note that microwave drying is best suited for small batches of figs.
For larger quantities, other methods may be more efficient.

Here’s how to dry figs using a microwave:
- Arrange the halved figs with the cut sides facing up, evenly spaced on a microwave-safe dish.
- Set your microwave to a low power setting, usually around 20% to 30% of the maximum power. Microwaving at a lower power for a longer time helps prevent the figs from cooking or burning.
- Microwave the figs for about 10 minutes initially.
- After this time, check the figs to see if they are dry enough. If not, continue microwaving in two-minute increments, checking after each one until the figs are dried to your preference.
- After drying, allow the figs to cool down before transferring them to an airtight container for storage.
Top tip: Pay extra careful attention to your figs while they’re in the microwave to prevent them from overheating and potentially burning.
Preparing Figs for Drying
Now that you’ve learned how to dry figs using different methods, you should first learn how to prepare them to ensure successful drying!
Luckily, preparing figs for drying is a straightforward process that involves a few simple steps.
Here's how to do it:
Step 1: Gather Your Supplies
Before you begin, make sure to prepare the following supplies:
- Ripe figs
- Clean cutting board
- Sharp knife or kitchen scissors
- One bowl of water mixed with lemon juice
- Clean kitchen towel
Step 2: Wash the Figs
Start by giving the figs a gentle rinse under cold running water. This step removes any dirt or debris from the skin.
Make sure you clean them thoroughly and then pat them dry with a clean kitchen towel.
Step 3: Trim the Stems
Next, trim the stems of the figs. The stem is the small, woody part at the top where the fig was attached to the tree.
Use a sharp knife or kitchen scissors to cut them off as close to the fig as possible without removing too much of the flesh.
Step 4: Cut the Figs in Half
Now go ahead and cut the figs in half from top to bottom. This helps the drying process by exposing more of the fig's surface area to the heat.
Step 5: Do a Pre-Treatment (Optional)
If you want to prevent browning and extend the shelf life of your dried figs, you can dip them briefly in a solution of lemon juice and water.
This solution is made by mixing 1 cup of lemon juice with 3 cups of water.
This step is entirely optional but can be beneficial.
Step 6: Arrange for Drying
Once your figs are prepared, you're ready to dry them. Arrange the prepared figs on drying trays or racks, ensuring they are not touching to allow proper air circulation.

Benefits of Drying Figs
Drying is among the oldest food preservation methods, safely extending seasonal ingredients' shelf life by removing their moisture content.
For delicate figs that struggle to last for more than a few days after being harvested or purchased, drying allows you to enjoy their flavor all year.
But aside from granting a longer shelf life measured in months instead of days, the benefits of dried figs include the following:
- Concentrates sweetness. By removing the water content of figs, drying concentrates their natural sweetness and enhances their wonderful flavor.
- Offers a healthy alternative to other sweet treats. The concentrated sweetness of dried figs makes them a fantastic alternative to sugar-loaded candies.
They're brimming with fiber, which is a boon for your digestive system, and they're a treasure trove of vital minerals like potassium, magnesium, and calcium.
- Provides incredible versatility. Dried figs are kitchen superheroes. You can toss them into salads, oatmeal, or yogurt. You can enjoy them on their own or as part of a fruit platter!
They play well in both sweet and savory recipes.
- Curbs microbial growth. Moisture is essential to the growth and multiplication of microbes.
So by drying them and removing their moisture, you can help decrease the chances of bacterial or mold growth in your figs.
This not only enhances your fruits’ shelf life but also ensures they remain safe for consumption for a prolonged period.
- Prevents waste. Of course, drying figs is also a great way to use up a surplus of fresh figs before they go bad. No more fruit going to waste!
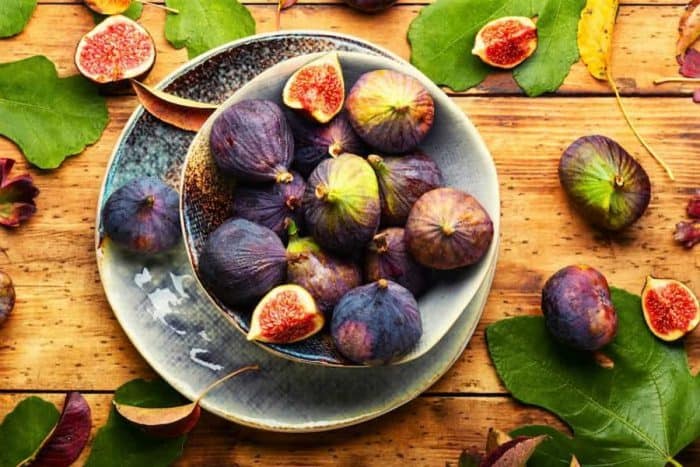
Choosing the Right Figs for Drying
Choosing the right figs for drying is a bit like choosing the perfect moment to capture in a photograph. You're looking for that sweet spot, where the figs are at their prime.
Now you might be thinking, "That sounds lovely, but how do I actually do that?"
Don't worry; here are some guiding tips to help you!
Select Figs That Are Not too Ripe or Underripe
Underripe figs are not as sweet as ripe figs, and they won’t magically become sweet when dried. So they won’t be as enjoyable to eat.
Overripe figs, on the other hand, are too soft to handle. They may also not dry well.
So when selecting figs, think Goldilocks. Go for ones that are neither underripe nor overripe.
Here are some tips to help you check for ripeness and ensure you get perfectly ripe figs:
- Gently press the fig with your fingers. It should give a little, meaning it's soft to the touch, like a ripe banana.
If it's rock-hard, it's underripe, which means it may not be ready for drying yet. On the other hand, if it’s way too mushy, it’s likely overripe. - Check the smell. Here's a fun one — give your figs a little sniff! Ripe figs have a sweet, almost floral fragrance.
If your figs smell temptingly sweet, it's a good indicator that they're ready for drying. - Look for vibrant skin. Your fig's skin should be smooth, shiny, and free from blemishes, cracks, or bruises, indicating its ripeness and suitability for drying.

Avoid Damaged Figs
Always steer clear of figs that have visible damage. If a fig has cracks, splits, or mold, it's best to leave it behind.
Damaged figs can spoil the whole batch, and we definitely want to avoid that.
Remember That Size Matters
While size doesn't necessarily determine ripeness or quality, larger figs can be easier to work with when drying.
Plus, drying can shrink your figs, so starting with smaller figs may not yield desirable results.
Avoid Fig Wasp Residue
Fig wasps are natural pollinators of figs. And sometimes you may find traces of these tiny insects inside the fig.
While this is entirely natural and safe to eat, some people prefer to cut off the tip of the fig where the wasp entered, especially when using fresh figs for drying.
Test a Few First
If you're uncertain about the ripeness or quality of your figs, start by drying a small batch first.
This way, you can gauge the results and adjust your selection criteria for the next batch.

Frequently Asked Questions
Do You Peel Figs Before Drying?
No. There's no need to peel your figs before you dry them. The skin of the fig is completely edible and actually holds a significant amount of the fig's overall nutritional value.
It contains fiber, and nutrients and gives the dried fig its chewy texture.
Leaving the skin on also helps to retain the fig's natural sugars during the drying process, which enhances its sweetness.
So keeping the skin not only saves you time and effort but also boosts the health benefits and flavor of your dried figs.
How Do You Know if The Dried Fig Has Already Gone Bad?
You can tell if a dried fig has gone bad by checking some red flags.
Here are some telltale signs that the dried fig is already past its prime:
- Mold — If you see any spots of mold, usually appear as fuzzy spots in colors like white, blue, green, or black.
- Smell — Fresh dried figs have a sweet, pleasant smell. If your dried figs emit a sour, off-putting odor, they've likely gone bad.
- Texture — While dried figs are naturally a bit hard, they should still have a certain level of pliability. If your figs have become excessively hard, almost rock-like, or overly dry, they need to be discarded.
- Taste — If you're still unsure, you can taste a tiny bit of the fig. If it has a sour or off-taste, spit it out and throw the rest.
Drying Figs Is a Culinary Adventure!
The process of drying figs gives you a gateway to enjoying these luscious fruits all year round.
Beyond giving you a wholesome, sweet snack that's ready whenever you crave, you'll also embark on a delightful exploration to identify your preferred method.
Remember that you can opt for age-old methods of drying figs in the sun or with air or choose modern, practical methods of using the oven, the microwave, or a dehydrator.
Don't hesitate; try one of these methods today and experience the magic of transforming fresh figs into tasty delights you can enjoy any season!
Leave a Reply