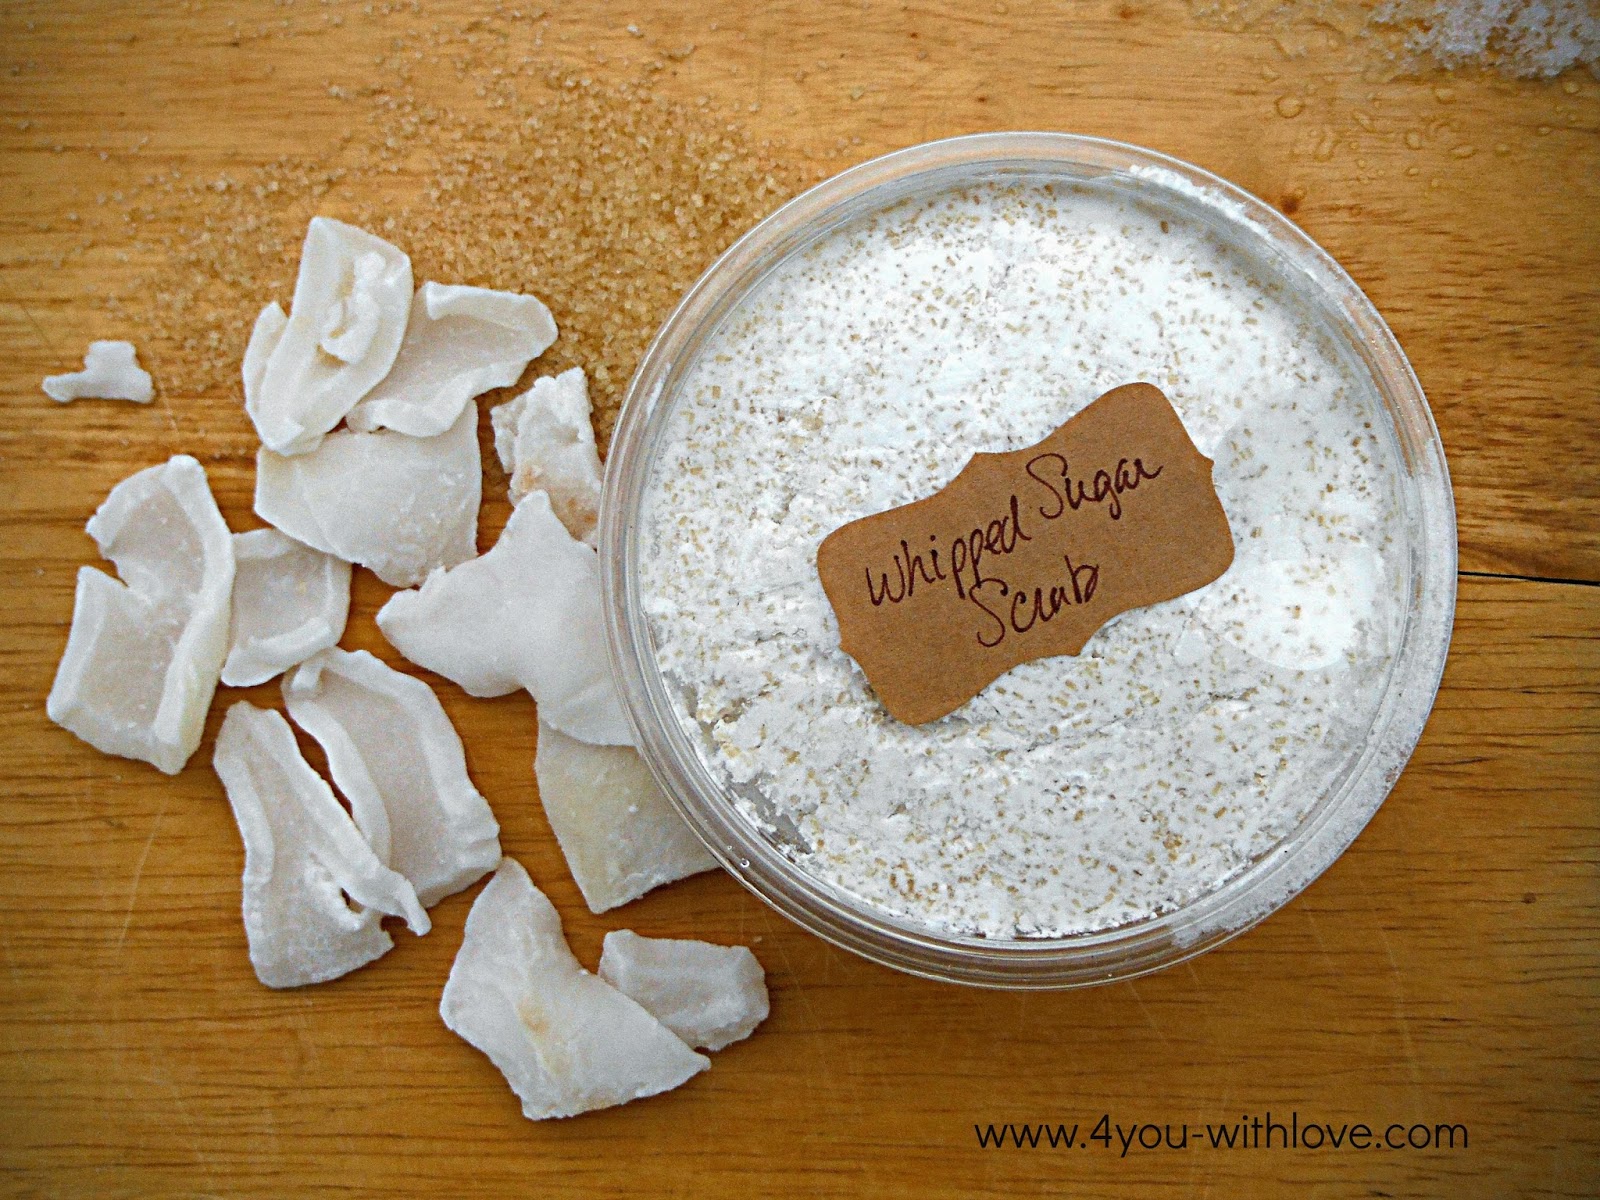
You've probably heard all sorts of "authorities" talk about the benefits of cooking food from scratch rather than eating processed or prepared foods. Well, I'm going to let you in on a little secret: this can be said for making your own beauty products. Now, before you say, "What, me? Make my own beauty products?" Grab a drink (coffee, tea, water, etc), get comfortable, and let me share with you a great whipped sugar scrub recipe you can make in no time with supplies available at your local grocery store.
Yes, you heard me correctly, everything can be picked up in your next trip to the supermarket.
Jump to:

How to Make This Whipped Sugar Scrub
Doesn't this look awesome? And trust me, it really is super easy to make, just start with a blend of oils. I use the following ratio for my whipped sugar scrub.
If you use less liquid oil you will get a stiffer whipped scrub while using more liquid oil will create a softer scrub. Feel free to adjust this ratio to create a scrub that you will enjoy. The whipped scrub we are going to make today uses the following oils (which I picked up at my local Kroger store):
- Lighter Flavor Olive Oil (a light olive oil does not have that heavy olive smell)
- Virgin Unrefined Coconut Oil (this oil has a pleasant coconut smell that will create a scrub with a heavenly aroma)

There are only 2 other ingredients necessary to make your scrub and I bet you already have them in your pantry!
So, are you ready to make some Whipped Sugar Scrub? Let's get started!
Ingredients Needed:
- ½ cup light olive oil
- ½ cup virgin unrefined coconut oil
- 1 cup sugar (I used turbinado but you could also use granulated sugar or brown sugar. If you use brown sugar, make sure there are no lumps)
- 1 tsp corn starch, optional (the addition of corn starch, helps cut down on the greasy feel of this scrub)
- 1-2 tsp of essential oils of your choosing {I love lavender & jasmine}
Whipped Sugar Scrub Instructions
Step 1: Measure & Heat Oils
Measure out all your ingredients. I measured out my oils by using a 1 cup pyrex measure and adding ½ cup olive oil. I then added coconut oil to my olive oil until there was a combination of 1 cup of oils. Place your oils in the microwave and cook on high, 1 minute at a time, until the oils have melted. Be careful....you don't want to overheat your oil.

Step 2: Mix everything together
Once your oils have melted, pour them into a mixing bowl with a lot of space (I have a kitchen aid mixer and I poured my oils into the metal mixing bowl). At this point you can also add in the essential oils of your choosing. Feel free to add as much as you like but generally I start with about 1 tsp and go up from there depending on how potent I want the fragrance to be.
Step 3: Cool it down
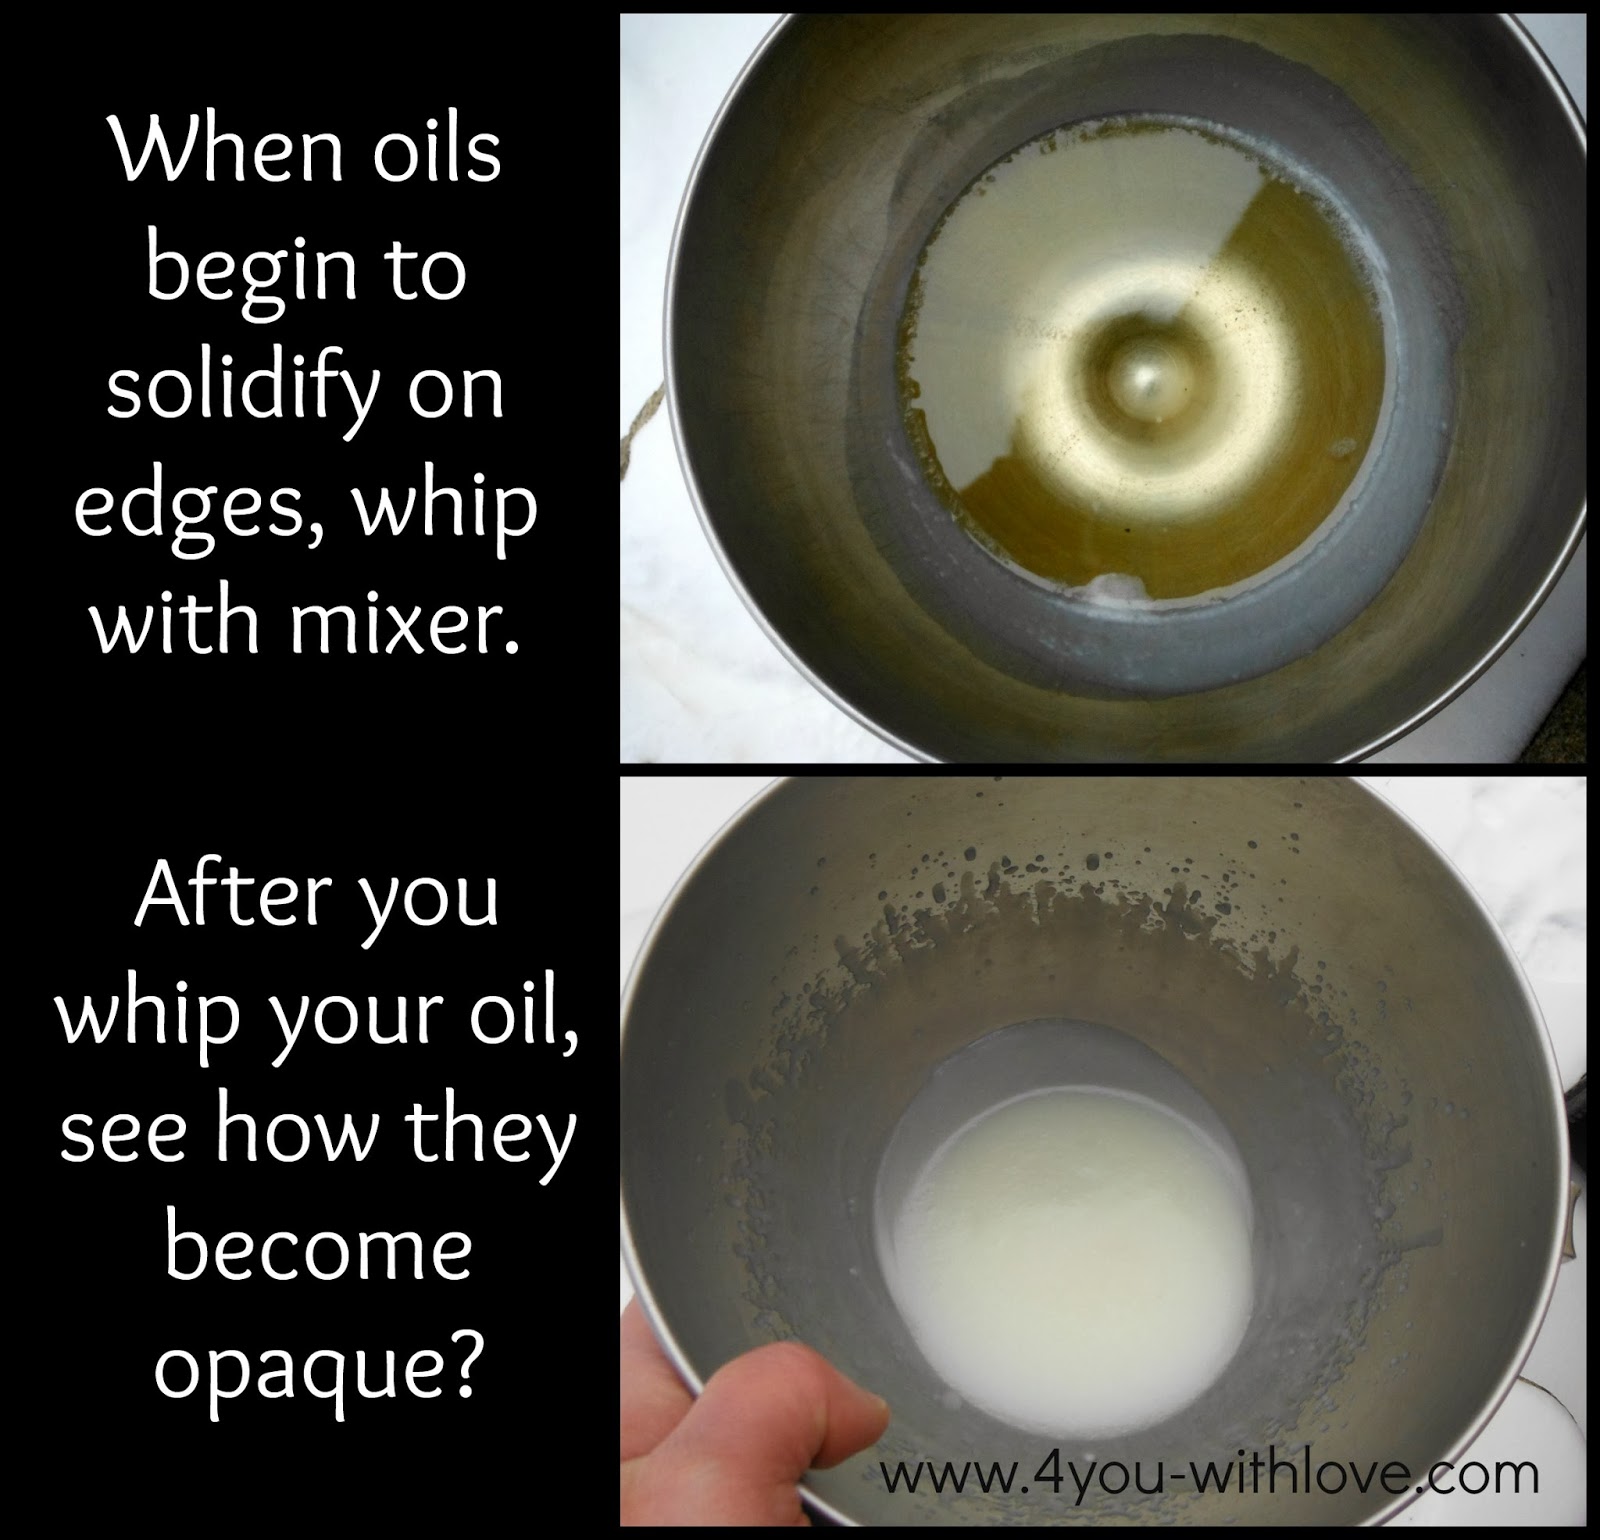
Next, place the mixture in the freezer to cool. After 10 minutes check to see if the edges are beginning to solidify. If not return back to the freezer and check every 5 minutes. (Look at the top picture below). Once you begin to see some of the oils beginning to harden, get out your mixer and begin to whip for about 30 seconds to 1 minute. The sides of your bowl are cold and will cool down the remaining oil causing it to turn opaque. See the bottom picture.

Step 4: Whip your oil
Now it's time to begin whipping your oil. When you first start, your oil mixture will achieve the look of vaseline (Top picture). Continue whipping your oils on high for approximately 2 minutes. Look how fluffy your oil mixture becomes (middle picture)! Now add the corn starch and mix a bit more (the bottom picture).

Step 5: Making it into a scrub
If you only wanted a body butter you could stop here. However, today we're making a scrub so let's add the sugar. You want to fold it into your whipped oils with a spoon/spatula (top picture). Now, it's time to place it in a container for storage. I used a non-breakable plastic food container since I would be using this scrub in the bathroom (bottom picture). You can use a mason jar or other container of your choice.

Whipped Sugar Scrub Tips & Tricks
Now be sure to label your scrub so someone does accidentally come along and eat it. If they do. don't worry. Since you made this, you can rest assure that there's nothing toxic in your new spa delight!
What do I do if the ingredients starts separating?
Some readers have mentioned that if they let the whipped sugar scrub sit for a while before using, the ingredients might start separating. If this has happened to you then I have a trick to keep the ingredients form separating: melt 1 tsp of emulsifying wax and mix it in. I hope that tips helps!
How do I make whipped gingerbread sugar scrub?
I LOVE gifting my whipped sugar scrub around the holidays. To add a little gingerbread flavor for some holiday fun, just add the following to the scrub:
- ½ tsp Cinnamon (or a few drops cinnamon oil)
- ¼ tsp Ginger
- ½ tsp Nutmeg
- ½ tsp Allspice
Do this at the step when you are mixing all the oils together.
How do I make whipped peppermint sugar scrub
A peppermint whipped sugar scrub is another great holiday gift idea. To make this recipe with peppermint added is super easy; simply add 2 teaspoons of peppermint oil during the step when you are mixing all the oils together. And if you want a stronger peppermint scent, feel free to add more as you see fit.


Kristyn
Will this work with fractionated coconut oil?
Jenny
I'm honestly not sure- It sounds like the fractionated coconut oil is meant to stay in liquid form but I think you should give it a try
Kim
I add 1 - 2 tablespoons of beeswax with the fractionated coconut oil to get it to hold. Works perfectly.
Jenny
Great tip! We'll add it in the recipe
Kayla Lewis
Hi Jenny, do you know if I could add aloe vera to this recipe. And do you add the beeswax to the oils you melt together or after you whip it and before adding the sugar. Thank you.
Jessica
And for the wax that helps it not separate, when do u add this in? Melted? Help! Lol ty I appreciate your help! 🙂
Jenny Melrose
Melt the wax and put it in at the end!
Amy Bonavia
I am making them for gifts how can i store them please?
Thanks
Jenny Melrose
Hi Amy, I recommend getting mason jars (look on Amazon or any craft store should have them). Don't forget to add 1 tsp or so of emulsifying wax to keep all the ingredients from separating. Store in a cool, dry place (kitchen cabinets should be fine). Thanks for reading!
Jessica
Hi, how much essential oils did you add? I new at this , ty!
Jenny Melrose
Hi Jessica- this is up to you. Just depends on which oil you are using and how fragrant you want it to be! I usually start with 1 tsp and go up from there.
Lecia
I made this with grape seed oil and it’s just fantastic!! Thanks!!
Jenny Melrose
Oh my gosh- soooo glad you like it! Thanks Lecia
Jenn Lenay
Thanks! This looks much better than the regular sugar scrub I make. I'm going to try this. Do you have any opinions on the difference with using unrefined vs. refined coconut oil other than the scent?
Jenny Melrose
Thanks for the comment! Either refined or unrefined coconut oil can work- why not try both? Would love to hear how it goes!
Lisa Kelly
Please advise how you keep the ingredients from separating once it sits for a while.
Jenny Melrose
Hi Lisa! I'll update the post but in short- melt 1 tsp of emulsifying wax and mix it in. That should do the trick!
Jennifer
I love the immediate result, but after being in the jar for 2 hours it had completely separated. Any tips on keeping this from happening?
Jacqui
Thank you for sharing your recipe! Can't wait to try it! Just a note...for many people with gluten issues, corn can't be used. Most corn in the US is GMO these days, so unfortunately not good for anyone. So, a good substitute might be tapioca starch! That should make this more user friendly for a lot of folks. Hope this helps someone.
Thanks again!
Jacqui
sherry
Can this method be used with something besides coconut oil? I need it to be nut free!
Claire
Coconut is a fruit
lorrie
coconut causes allergic reactions in many people who are allergic to tree nuts such as almonds and walnuts so much care should be taken.
Addison
Please be sure to fully educate yourself on a topic before offering an answer, especially with something as serious as an allergy. Comments like this spread misinformation can could end up potentially being dangerous for someone who may read your comment and trust that you are sharing accurate information. And though yes, coconut is a fruit, not only is your comment in no way relevant to what the user was actually asking but it also wasn’t helpful or informative in any way. Instead it just came across as condescending, snarky, and ironically uneducated.
jade
Try mango butter
Its a sold fat so should turn out the same and you get the bonus of a lovely smell
As for the its a friut comment below, coconut is still an allergen and even though its not as prevalent as nut and other allergies it mostly affects people who already have nut allergies
I'm just glad this lady had the common sense not to use it
Brittanie
Hi, I'm making these as gifts. How do I store them? The fridge? Will they melt if not?
Zelma
Great blog! Do you hve any tips for aspiring writers?
I'm planning to start mmy own blog soon but I'm a little lost on everything.
Would you recommend staring with a free platform like Wordprress or
go for a paid option? There are so many choices
out there that I'm completely overwhelmed .. Any ideas? Thanks a lot!
Ludo
The original above recipe turned out great! Tried this with solid coconut oil and fractionated coconut oil, took a long time and was the consistency of a cream soup.
katie
how much does this make??
Nancy Dierkes
How much does this make?
Heatherr
Hey, I just found your site through pinterest, I was just wondering how long the sugar scrub, or body butter would last? does it go off?
Hayley Roberts
Was also wondering how long it would last?
Lauren @ The Thinking Closet
This would make a perfect mother's day or teacher appreciation gift! Thanks for the inspiration, Marilyn!
Cher @ Designs by Studio C
How fabulous that all of the ingredients can be found at the local grocery store!! Thank you for sharing!