
Got a sweet tooth that only the divine duo of chocolate and peanut butter can satisfy?
Look no further! These chocolate peanut butter brownies are a tantalizing tango of flavors that you can whip up in under 40 minutes, promising a dessert experience like no other.
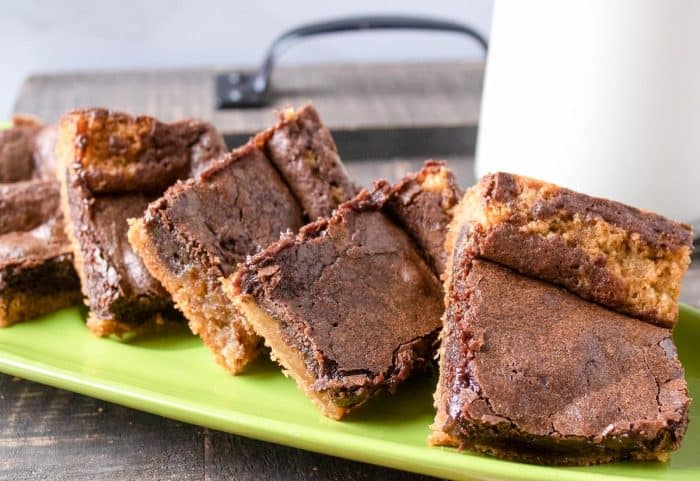
Perfectly designed for fans of the classic pairing of chocolate and peanut butter, this recipe results in a melt-in-your-mouth, irresistible texture that's sure to delight.
Intrigued? Read on to get our easy-to-follow recipe, and let's get baking!
What Makes These Chocolate Peanut Butter Brownies So Good
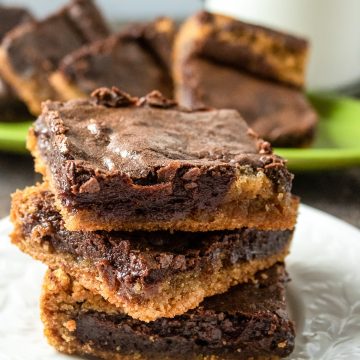
- Incredible flavor combination — This recipe brings together the classic duo of rich chocolate and creamy peanut butter, which is enjoyed in various other desserts like cookies, mug cakes, and dessert balls.
The result is an irresistible blend of sweet and slightly salty flavors that will make your taste buds dance with delight.
- Gooey texture — The brownies boast a crisp crust that gives way to a soft, moist center.
- Ease of preparation — With our clear, step-by-step instructions, even baking beginners can whip up a batch of these amazing brownies in under 40 minutes.
And unlike other chocolate peanut butter brownie recipes, this one only has two brownie layers, so even beginners can try it out!
Ingredients Needed
Before we dive into the baking process of chocolate peanut butter brownies, make sure you have all the necessary ingredients.
Here's what you'll need:
For Your Prep:
- Non-stick cooking spray
- Parchment paper
- Baking pan
For the Chocolate Layers:
- ½ cup of melted unsalted butter
- 1 cup of granulated sugar
- 1 ½ teaspoons of vanilla extract
- ½ cup of all-purpose flour
- ½ cup of unsweetened cocoa powder
- ⅛ teaspoon of salt
- 2 large eggs (about 2 oz. per egg)
For the Peanut Butter Layer:
- ⅓ cup of creamy peanut butter
- 2 tablespoons of unsalted butter, melted
- ⅓ cup of granulated sugar
- ¼ cup of packed brown sugar
- ½ teaspoon of real vanilla extract
- ½ cup of all-purpose flour
- 1 teaspoon of baking powder
- ⅛ teaspoon of salt
- 1 large egg (about 2 oz. per egg)
How To Bake the Best Chocolate Peanut Butter Brownies
Ready to bake your own chocolate peanut butter brownies?
This step-by-step guide will walk you through the process, ensuring you end up with a batch of deliciously gooey brownies.
Preheat and Prepare
Preheat your oven to 350°F (175°C). Line an 8-inch pan with parchment paper and spray it with non-stick cooking spray.
Mix the Chocolate Layer
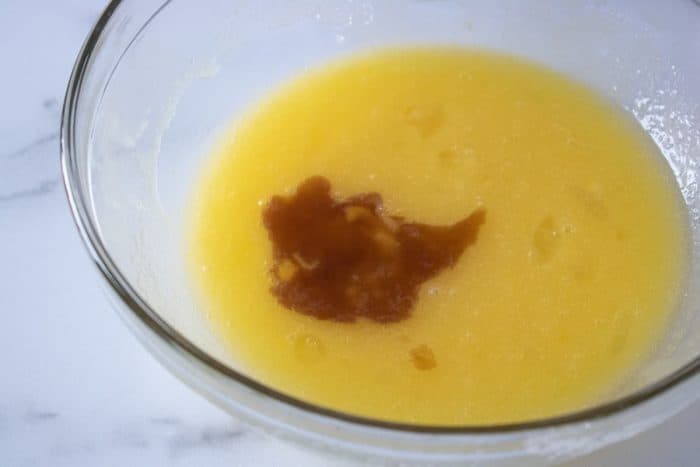
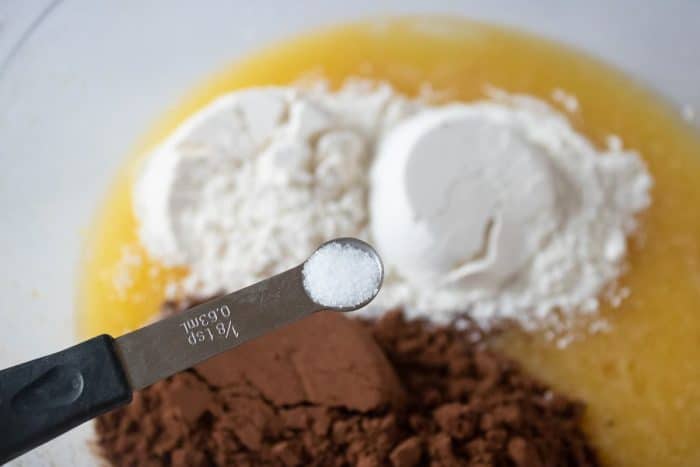
In a large mixing bowl, melt the butter, then stir in the sugar, eggs, and vanilla extract.

Next, gradually introduce the flour, cocoa powder, and salt.
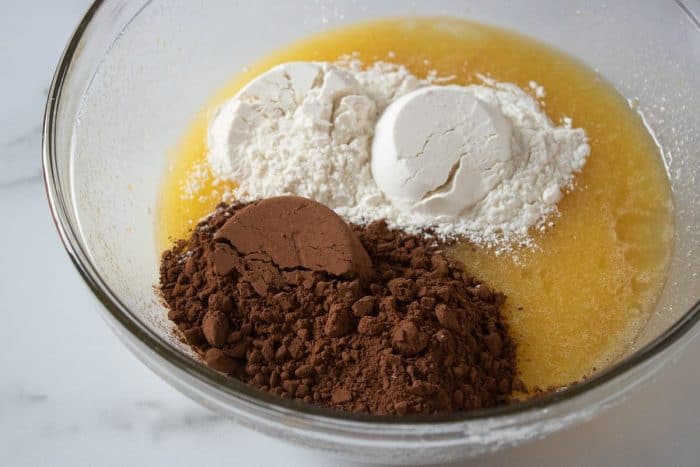
Lightly fold these dry ingredients into the mixture until just combined. Be careful not to overmix to maintain the brownie's signature fudgy texture.
Prepare the Peanut Butter Layer
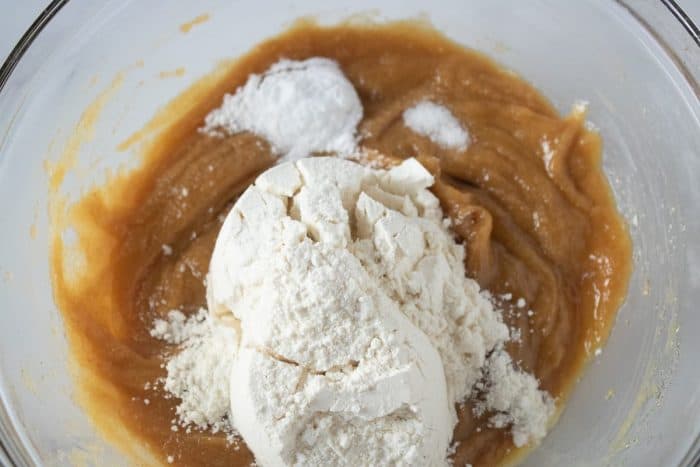
In a separate mixing bowl, melt the peanut butter, then add the granulated sugar, eggs, and vanilla extract.


Again, add the flour, baking powder, and salt last, stirring until just mixed.
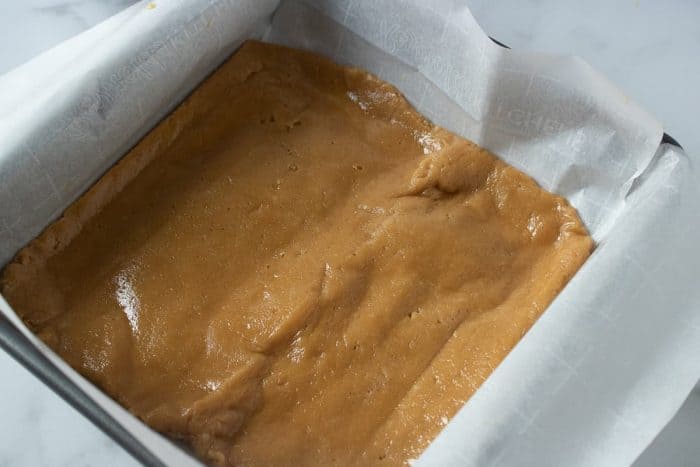
Pour the Peanut Butter Layer
Spread the peanut butter mixture evenly onto the parchment paper in the prepared pan.
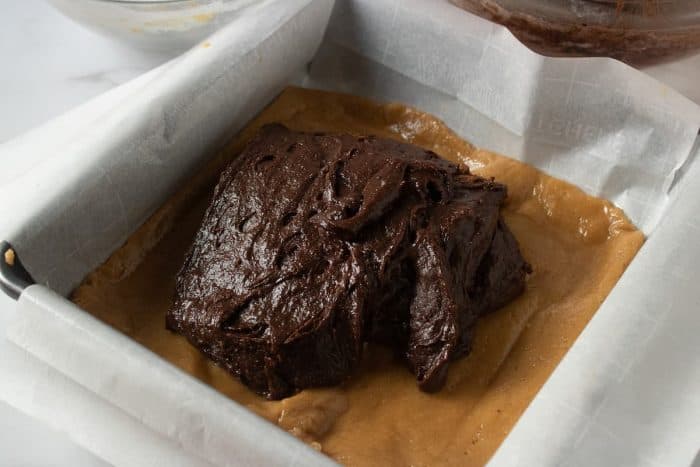
Pour the Chocolate Layer
Pour the chocolate brownie batter over the peanut butter layer, then spread it evenly to cover it completely.
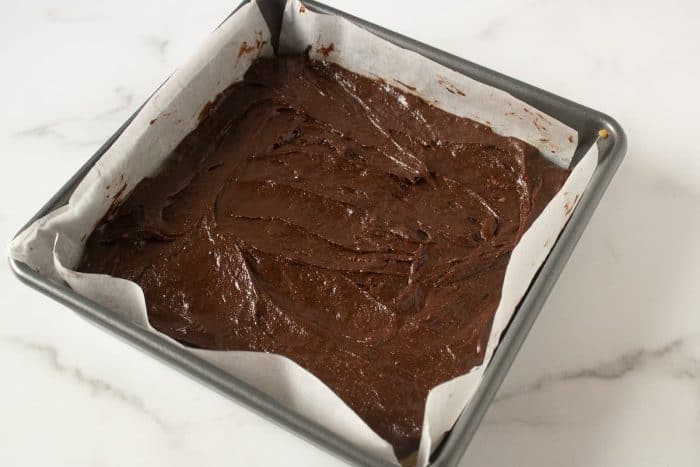
Bake and Allow To Cool
Bake in the preheated oven for 22 minutes or until done.
After this, allow the brownies to cool in the pan before cutting and serving.
Baking the Perfect Chocolate Peanut Butter Brownies: Expert Tips
- Ensure all ingredients are at room temperature.
Cold ingredients don't mix well, which can affect the texture of your final baked product and the length of your baking time too.
So make sure your ingredients — your eggs and peanut butter, in particular — are at room temperature before starting.
This small step can make a significant difference in achieving that perfect fudgy brownie consistency.
- Enhance the chocolate batter with a pinch of instant coffee or espresso powder.
This seemingly minor tweak doesn't introduce a coffee flavor to your brownies.
Instead, it works wonders in amplifying the chocolate's inherent richness, deepening its flavors, and adding a nuanced dimension.
- Wait until your brownies have completely cooled before cutting them.
If you want to cut your brownies into neat squares, wait until they have completely cooled so they don’t stick to your knife.
For even cleaner cuts, use a plastic knife or dip a sharp knife in hot water and wipe it dry before each cut.

Frequently Asked Questions
What Type of Chocolate is Best for This Recipe?
For this recipe, opt for high-quality semi-sweet or dark chocolate.
With their high cocoa content, they yield a deep chocolate flavor.
Semi-sweet chocolate (with 60% cocoa) offers balanced sweetness, while dark chocolate (with 70 to 85% cocoa) presents a robust, less sweet taste.
Also, their excellent melting properties ensure a smooth texture, enhancing the peanut butter's richness in the brownies.
How Do I Know When the Brownies Are Done Baking?
To determine if your brownies are done, insert a toothpick in the center; if it emerges with a few moist crumbs, they're done.
Brownies continue cooking slightly from residual heat after removal from the oven, contributing to a gooey texture.
So always lean toward underbaking to prevent dryness.
Can I Make These Brownies Gluten-Free?
Absolutely. These brownies can be made gluten-free by replacing the all-purpose flour with a gluten-free baking mix.
Ensure the mix is a 1:1 substitute for regular flour. This swap allows you to enjoy the same delicious, flourless recipe while catering to dietary restrictions or preferences.
What Can I Substitute for the Eggs In This Recipe?
To make this recipe egg-free, you can use "flaxseed eggs" or "chia seed eggs."
They act as thickeners, mimicking the binding property of actual eggs, so they can be used as directed in the recipe.
These are made by combining 1 tablespoon of ground flaxseeds or chia seeds with 3 tablespoons of water.
Can I Freeze These Brownies?
Absolutely! To freeze them, wrap each brownie individually and store it in a freezer-safe bag or container.
They'll retain their quality for up to 3 months.

Chocolate Peanut Butter Brownies
Ingredients
For the Chocolate Layer:
- ½ cup melted unsalted butter
- 1 cup granulated sugar
- 1 ½ teaspoons vanilla extract
- ½ cup all-purpose flour
- ½ cup unsweetened cocoa powder
- ⅛ teaspoon salt
- 2 large eggs about 2 oz. per egg
For the Peanut Butter Layer:
- ⅓ cup creamy peanut butter
- 2 tablespoons melted unsalted butter
- ⅓ cup granulated sugar
- ¼ cup packed brown sugar
- ½ teaspoon real vanilla extract
- ½ cup all-purpose flour
- 1 teaspoon of baking powder
- ⅛ teaspoon salt
- 1 large egg about 2 oz. per egg
Instructions
- Preheat your oven to 350°F (175°C). Line an 8-inch baking pan with parchment paper.
- Melt the butter in a large mixing bowl. Stir in the sugar, eggs, and vanilla extract.
- Gradually add the flour, cocoa powder, and salt. Be careful to lightly fold in the flour and cocoa powder until just mixed to avoid a cake-like texture.
- In a separate mixing bowl, melt the peanut butter. Add the granulated sugar, eggs, and vanilla extract.
- Add the flour, baking powder, and salt, stirring until just mixed.
- Pour the peanut butter mixture over the pan and top it with the chocolate brownie layer, spreading the batter for both layers out evenly.
- Bake in the preheated oven for 22 minutes. The brownies will be soft and gooey but will finish setting as they cool.
Nutrition
Related Recipes:
Share Your Baking Stories!
We hope you love this recipe for chocolate peanut butter brownies as much as we do!
If you try it, don’t forget to leave a comment below and let us know how it turned out.
Your feedback means a lot to us!
Don't forget to share your delicious creations on social media too; tag us so we can see your take on this gooey treat.
Enjoy baking your chocolate peanut butter brownies!
Leave a Reply